


Step by step process
1. For the child to be in the correct M-position (frog-leg position) in the baby carrier, the seat width must always extend from the back of one knee to the back of the other. The width of the seat should be adjusted before putting the carrier on. A good rule of thumb is: the width of the seat should be approximately half the baby's body length. Adjust it to the individual baby's size. Regularly check that the seat width still corresponds to the baby's size and widen it if necessary.
1. For the child to be in the correct M-position (frog-leg position) in the baby carrier, the seat width must always extend from the back of one knee to the back of the other. The width of the seat should be adjusted before putting the carrier on. A good rule of thumb is: the width of the seat should be approximately half the baby's body length. Adjust it to the individual baby's size. Regularly check that the seat width still corresponds to the baby's size and widen it if necessary.

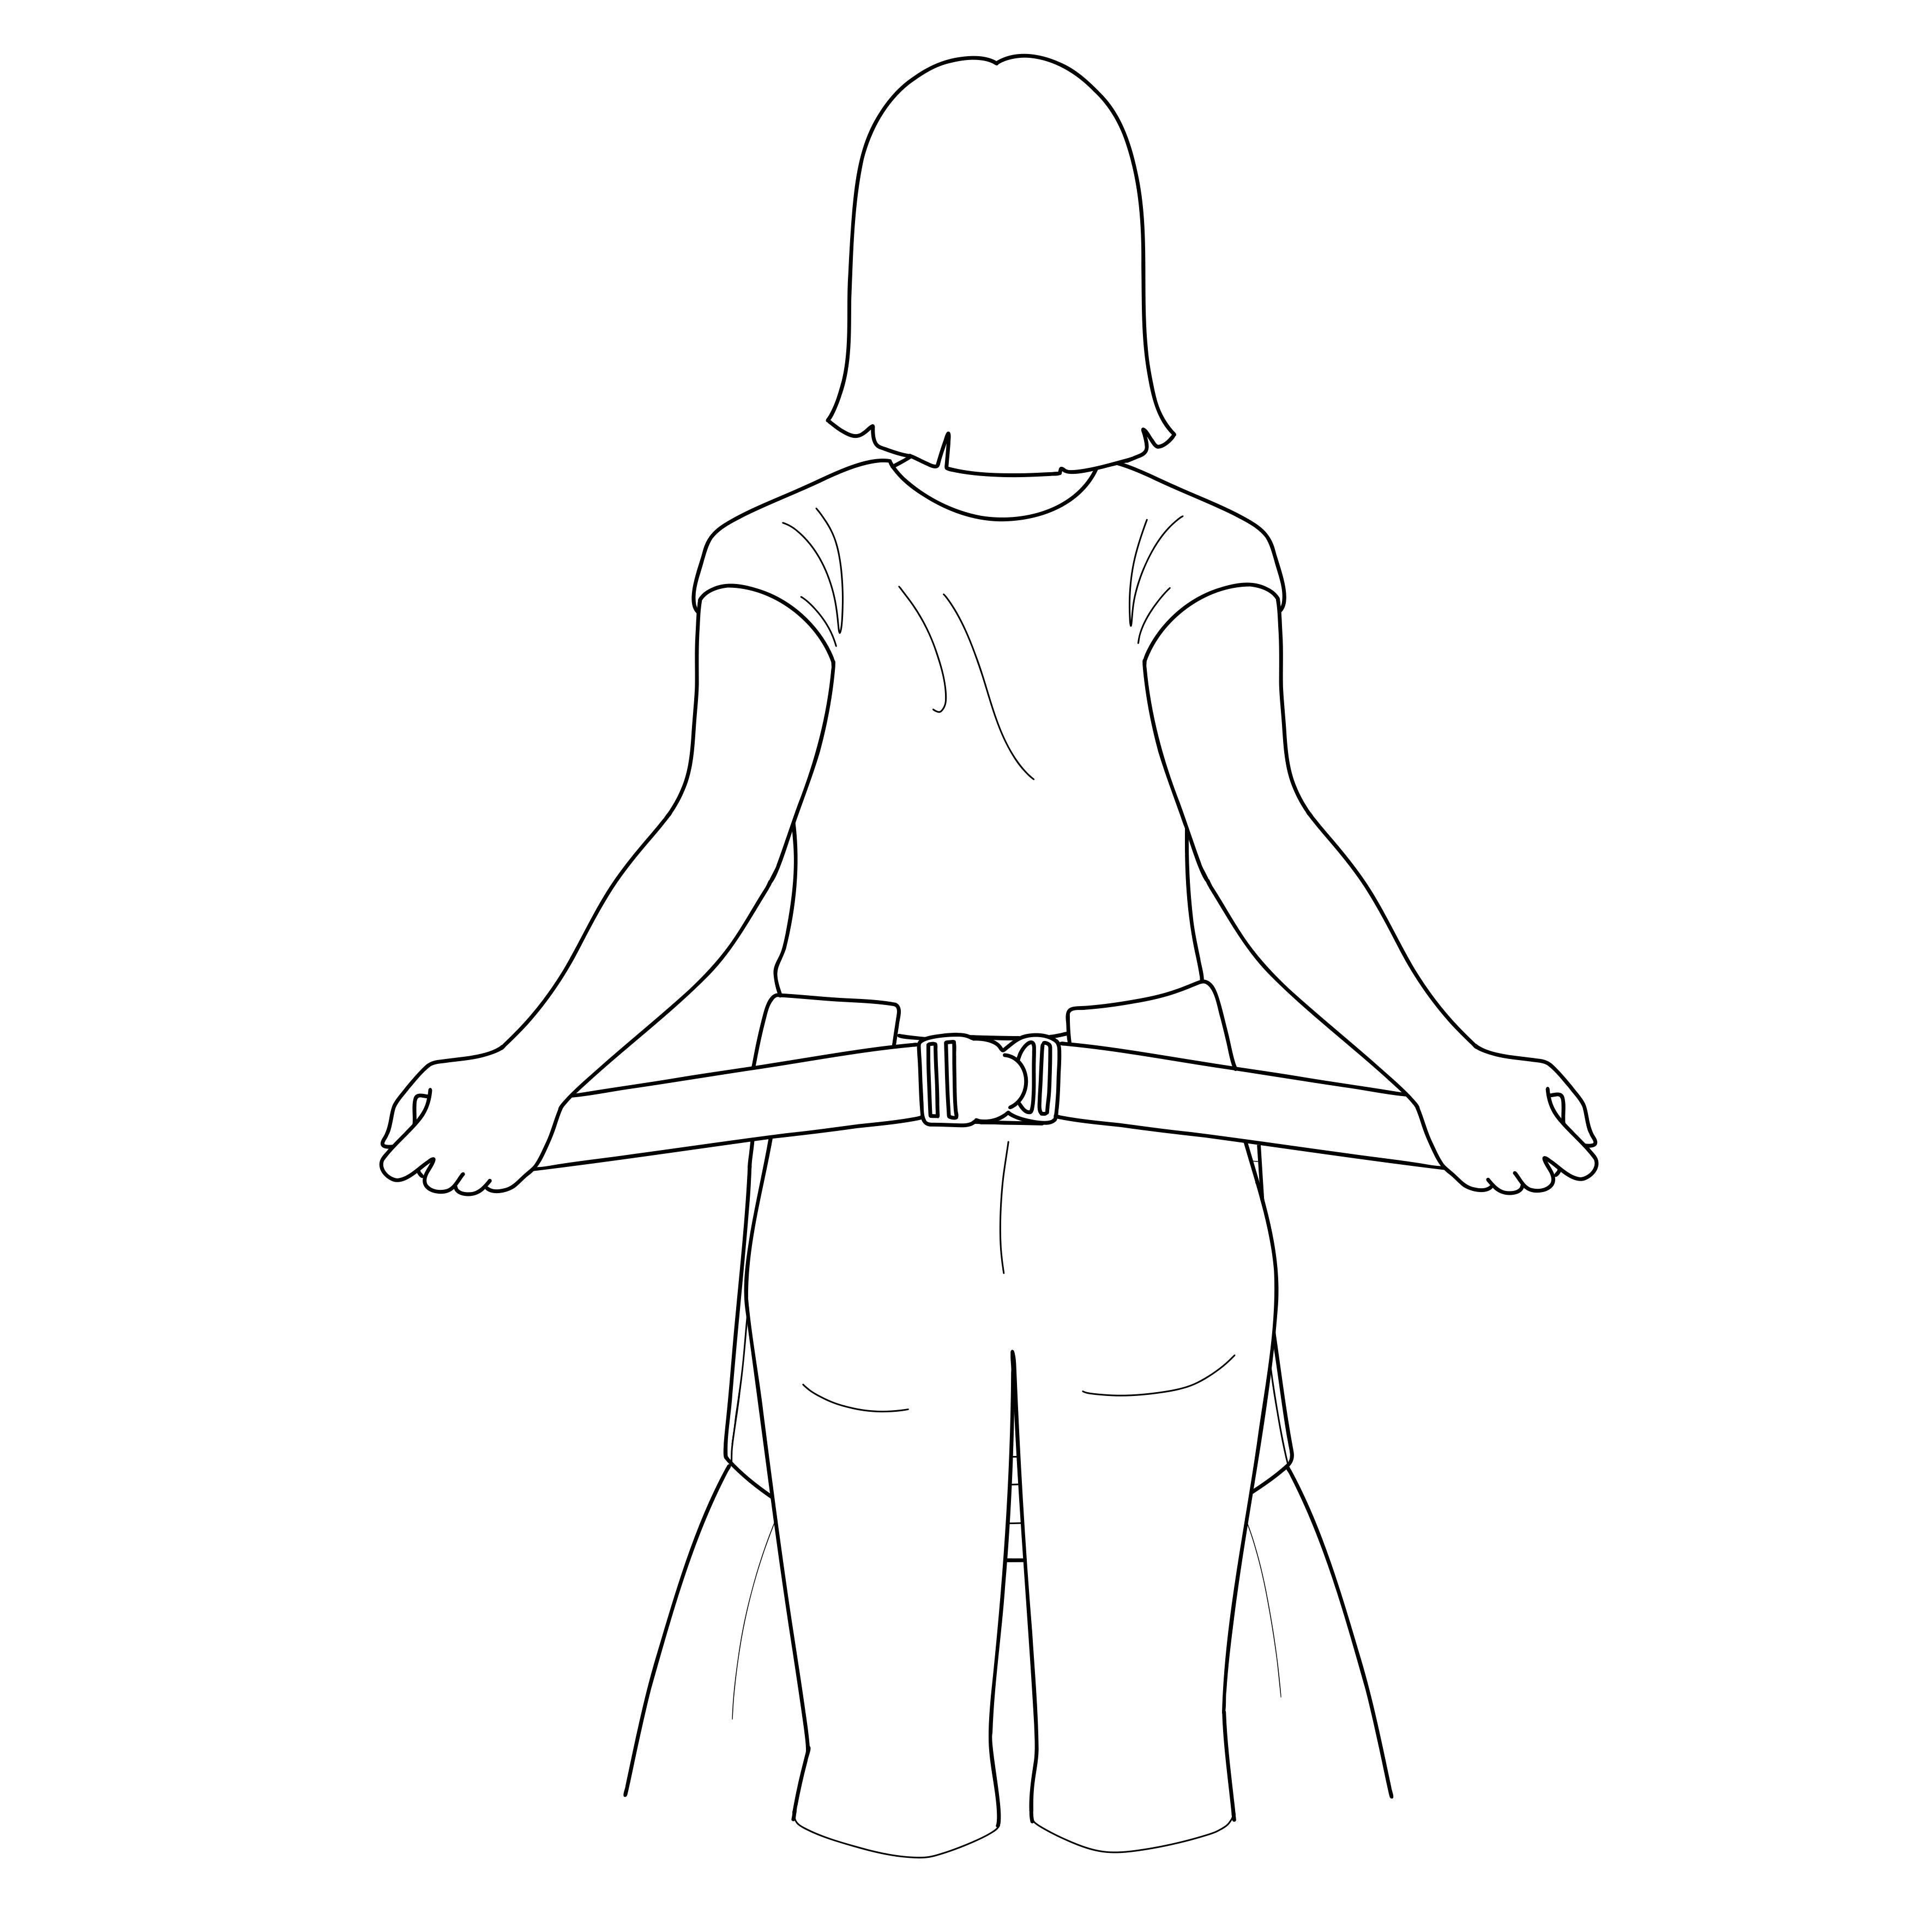
2. Put the pre-set baby carrier around your neck with the strap facing outwards.
2. Put the pre-set baby carrier around your neck with the strap facing outwards.
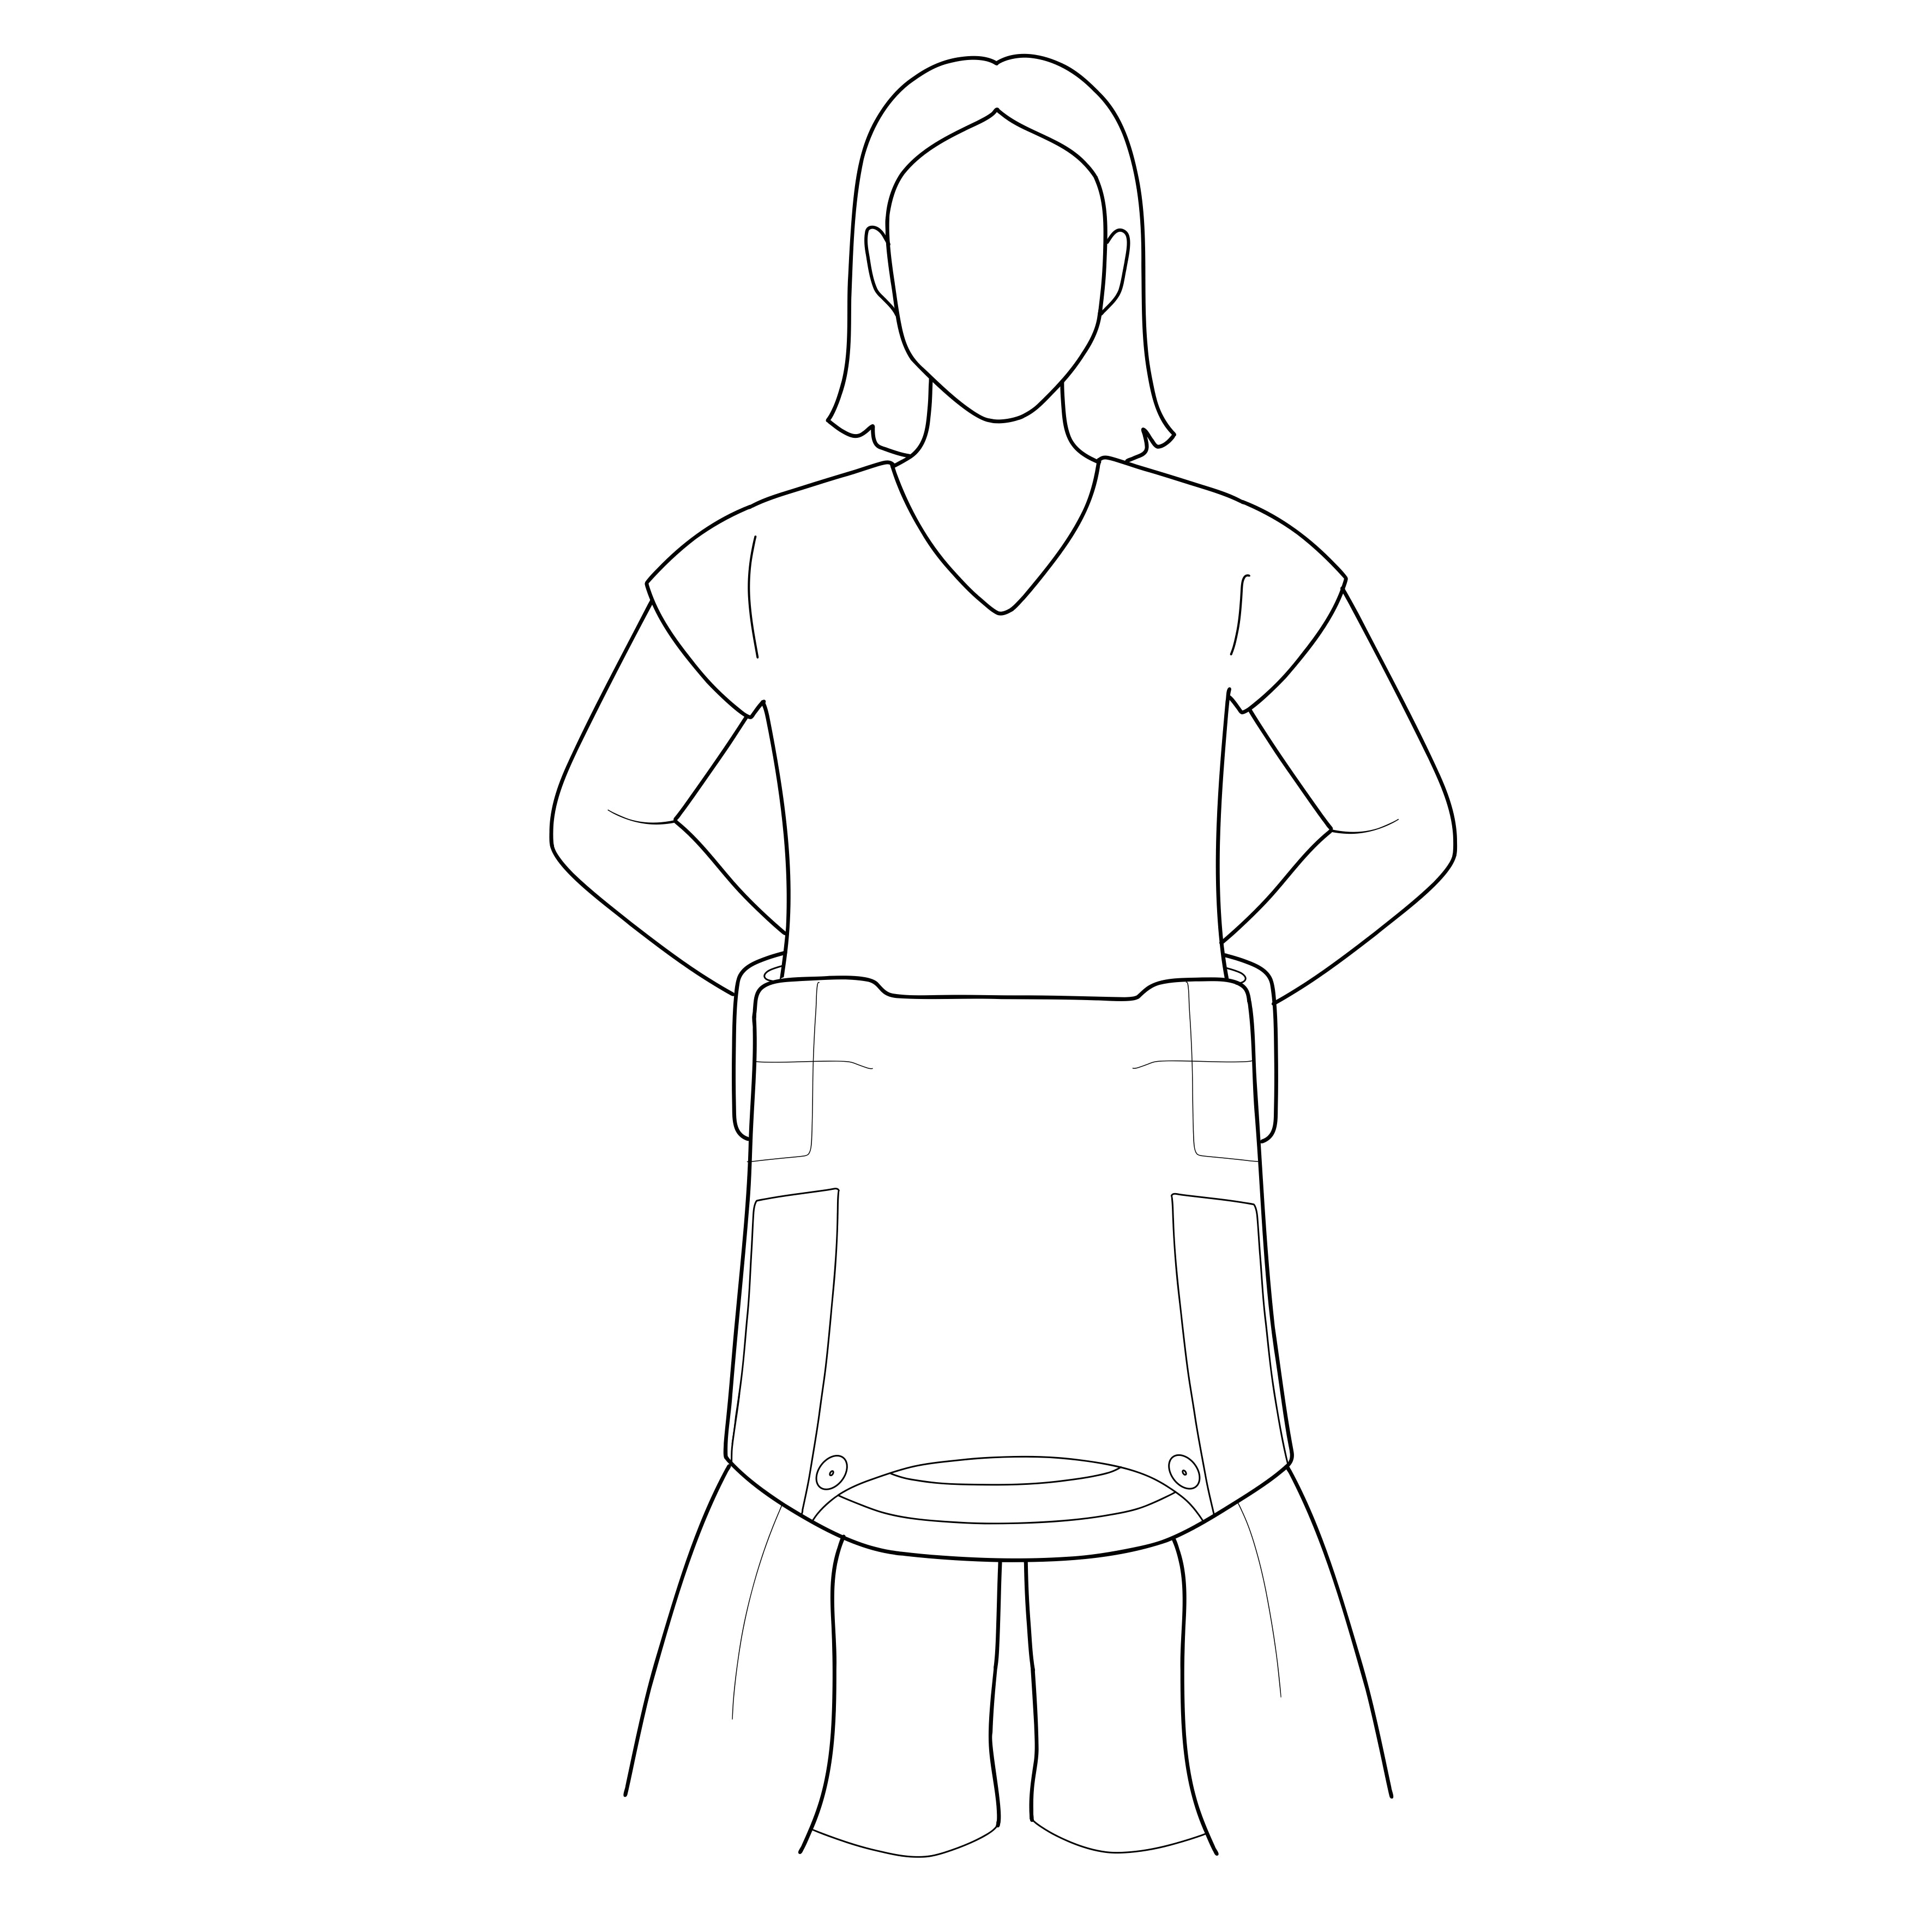
3. Close the buckle until it clicks audibly into place.
3. Close the buckle until it clicks audibly into place.
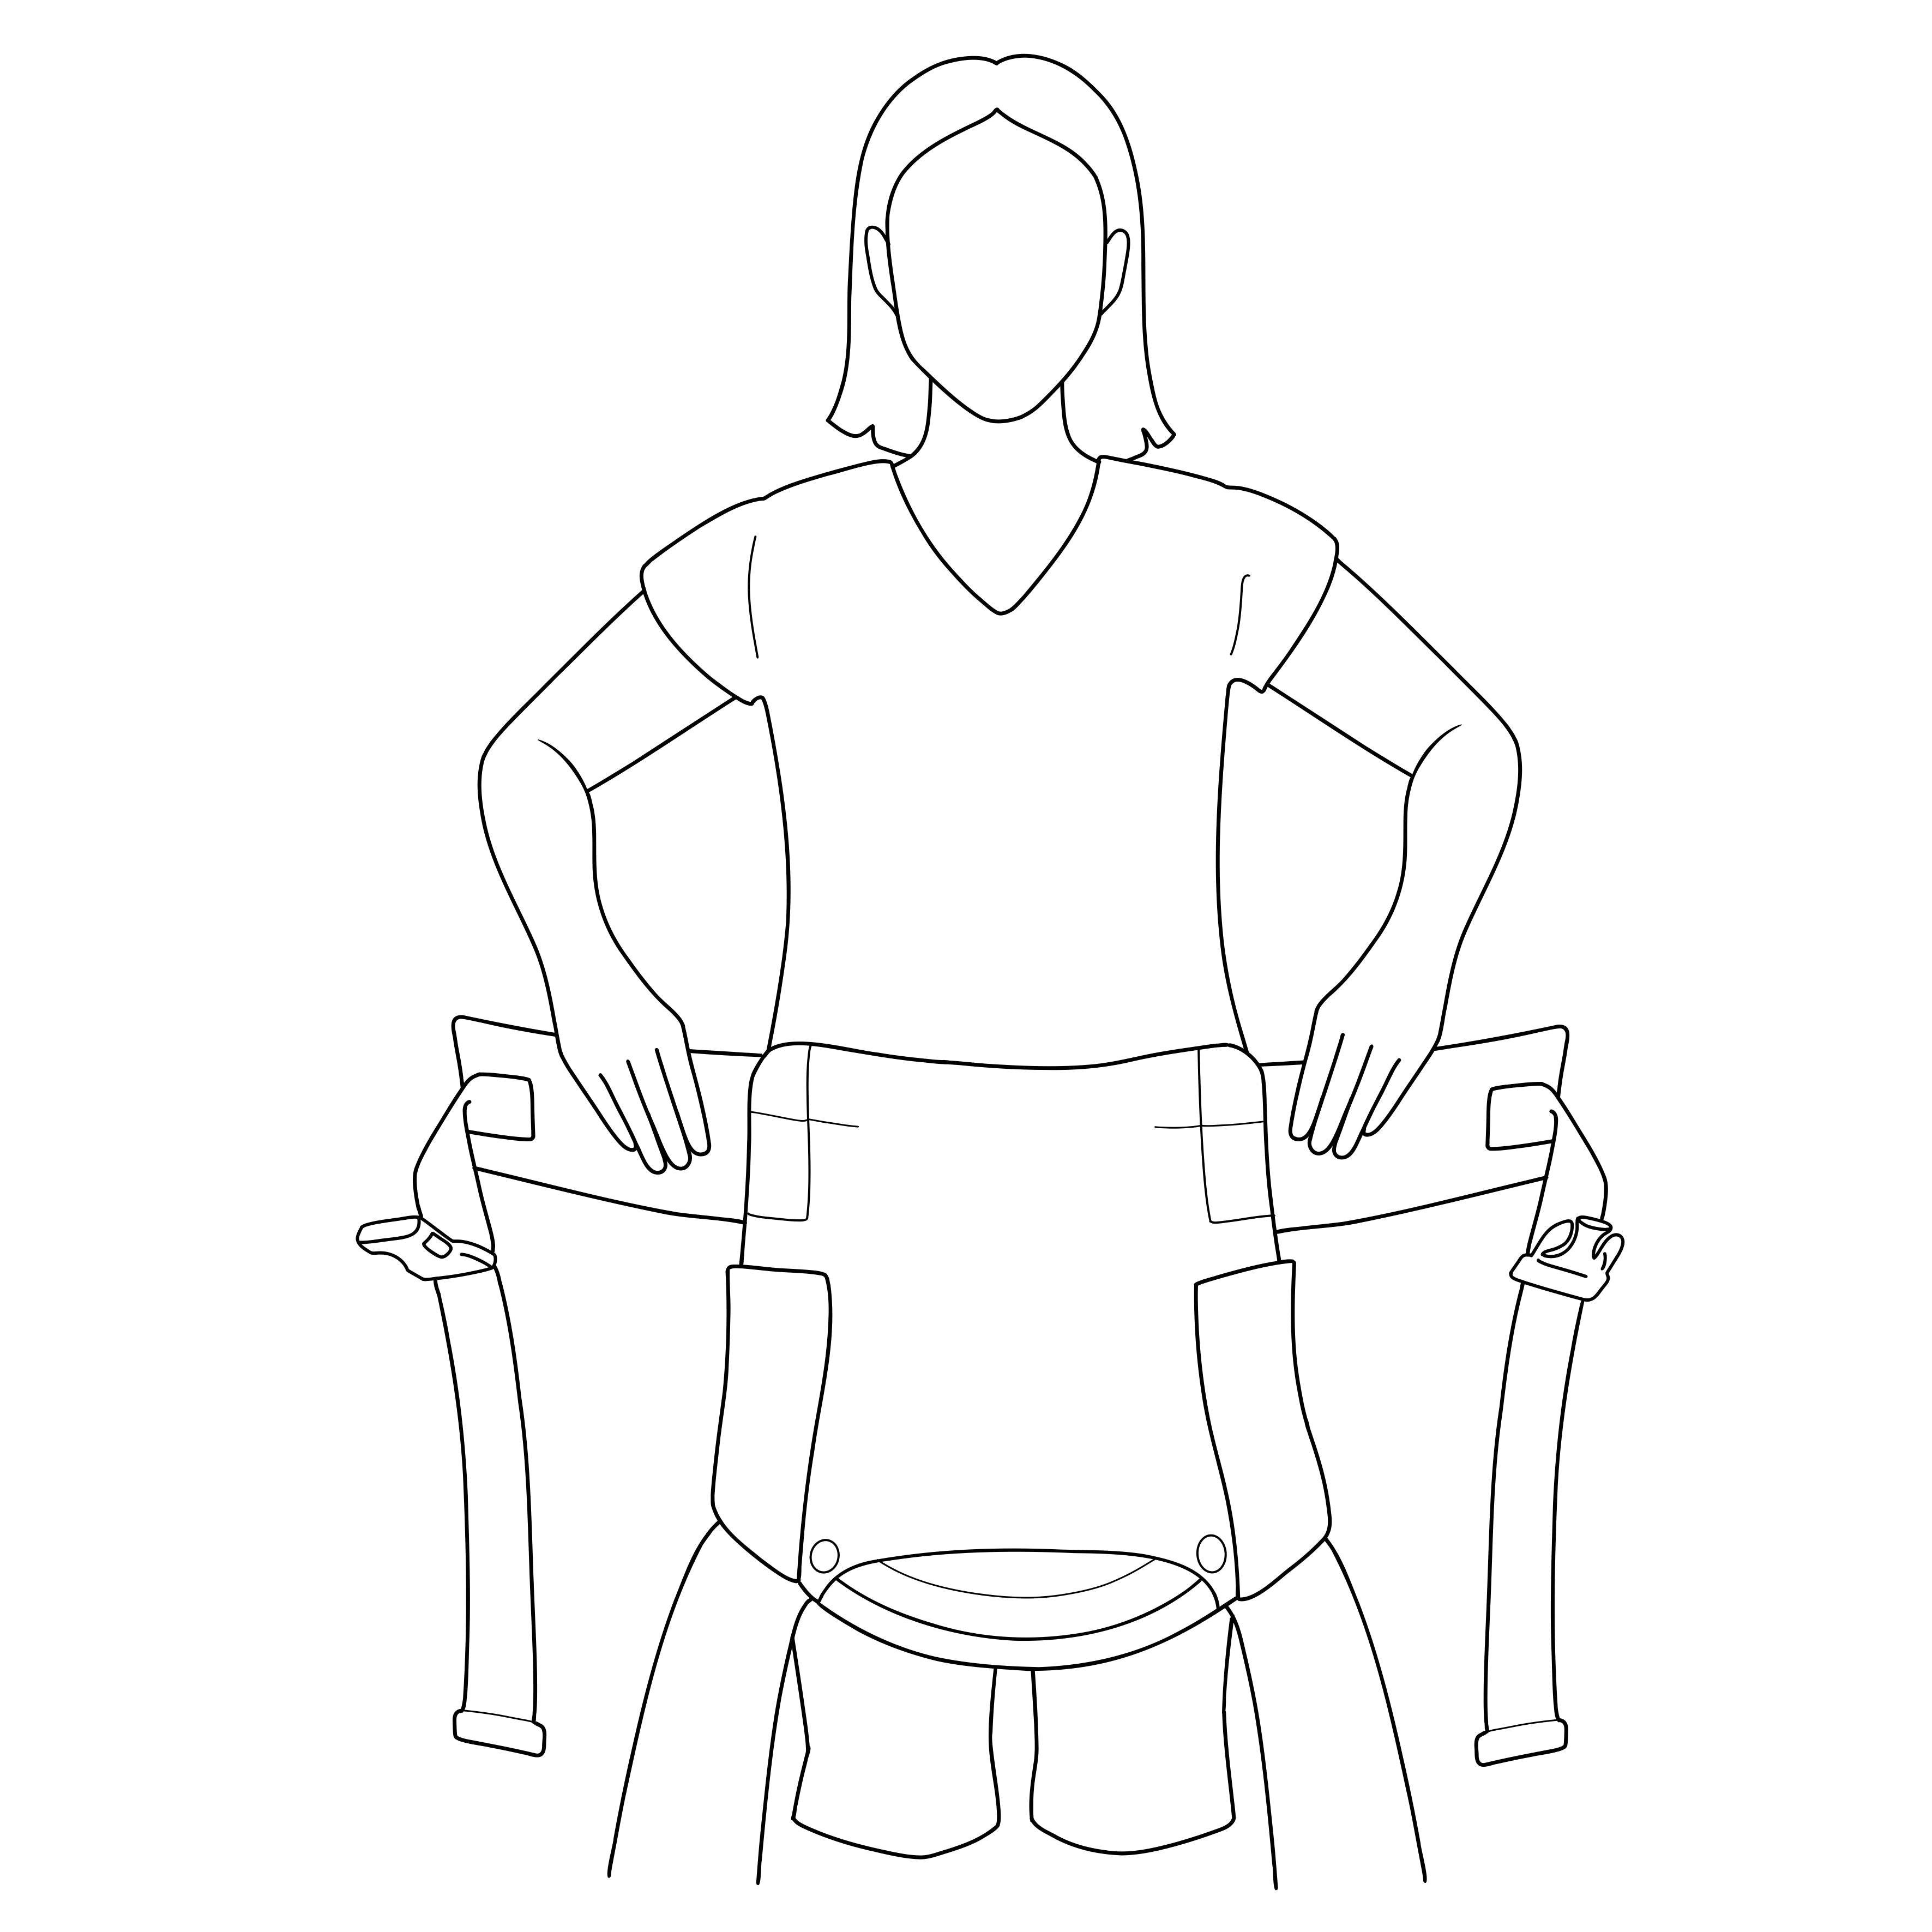
4. Tighten the hip belt.
4. Tighten the hip belt.
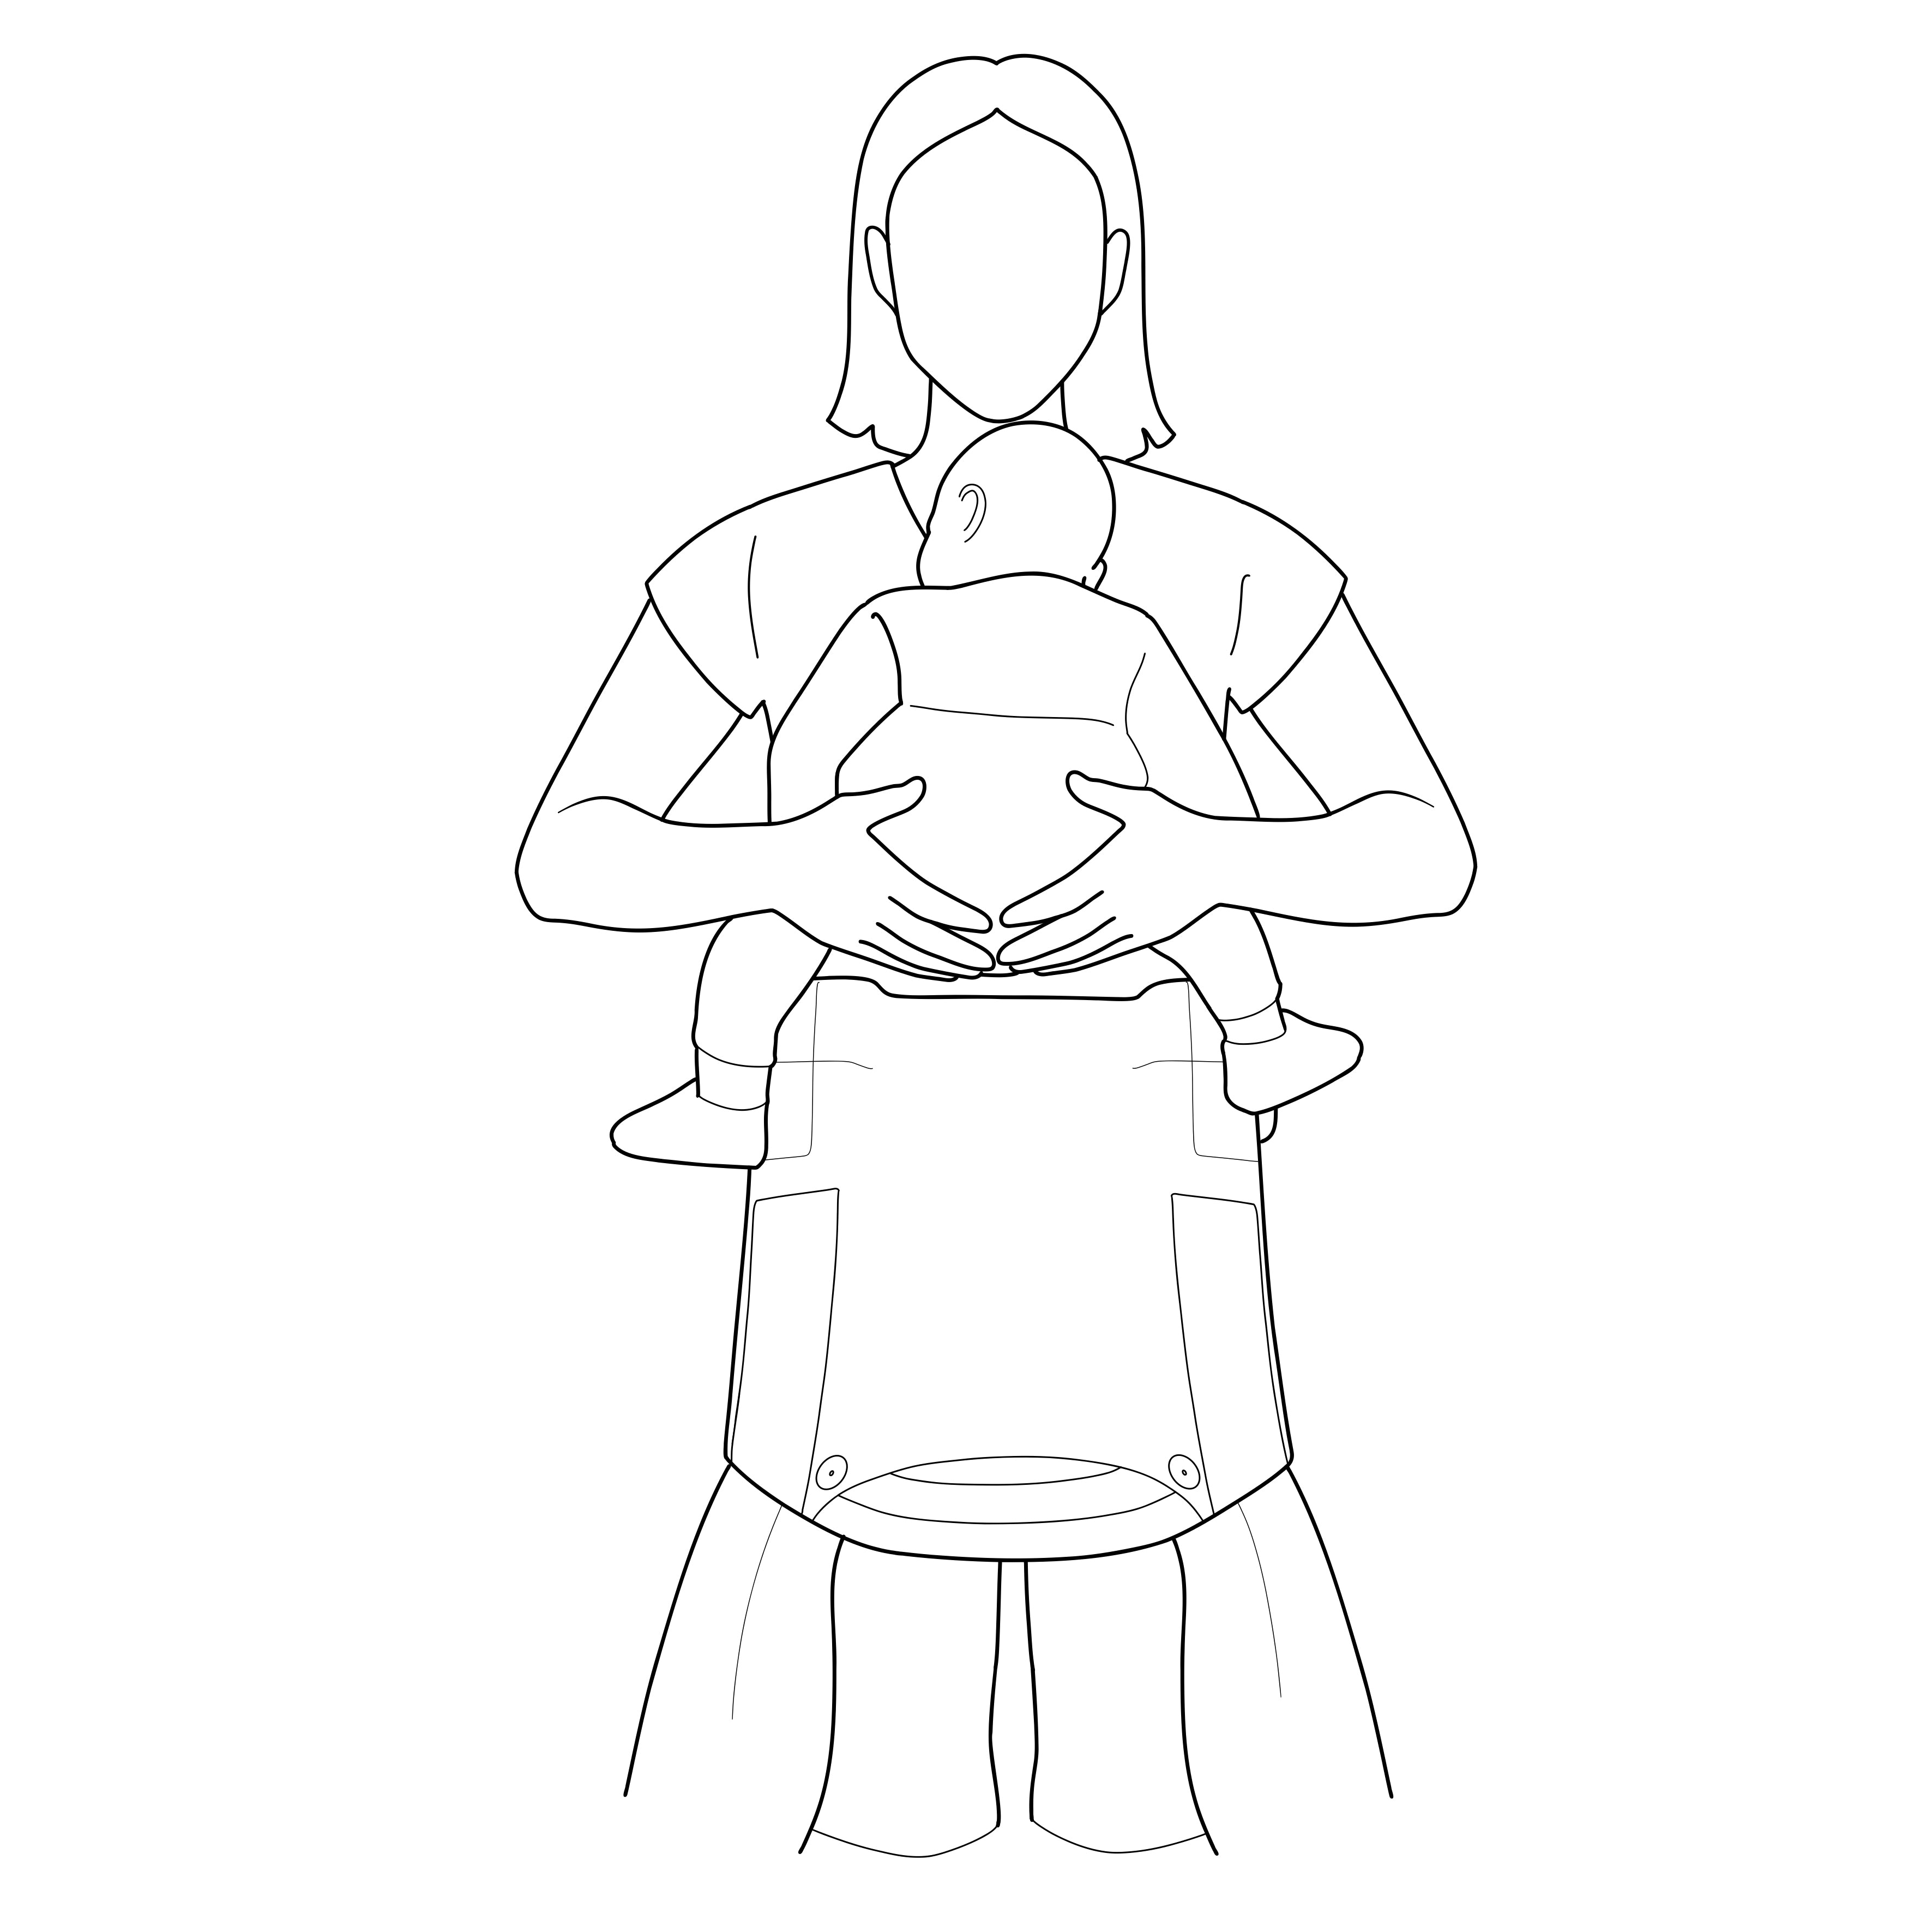
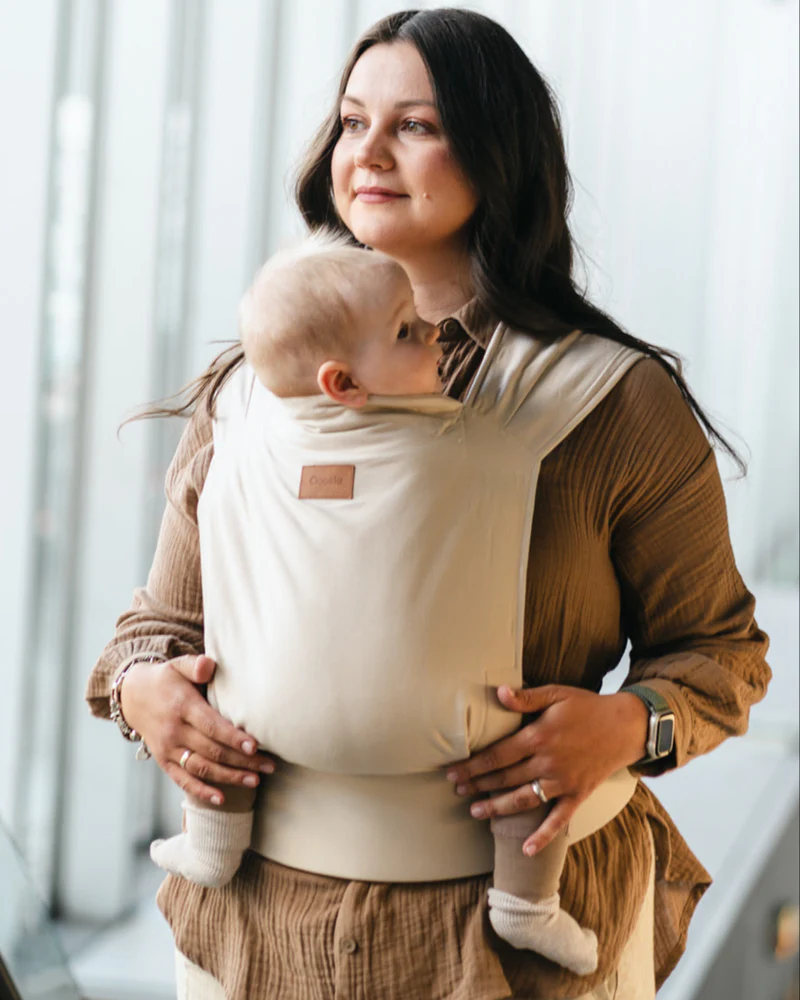
5. Place the baby on the hip belt at head-kissing height. The seat should extend from the back of one knee to the back of the other.
5. Place the baby on the hip belt at head-kissing height. The seat should extend from the back of one knee to the back of the other.

6. Lift the back panel and place one Carriers over the shoulder. Support your baby with the other shoulder. Hand.
6. Lift the back panel and place one Carriers over the shoulder. Support your baby with the other shoulder. Hand.
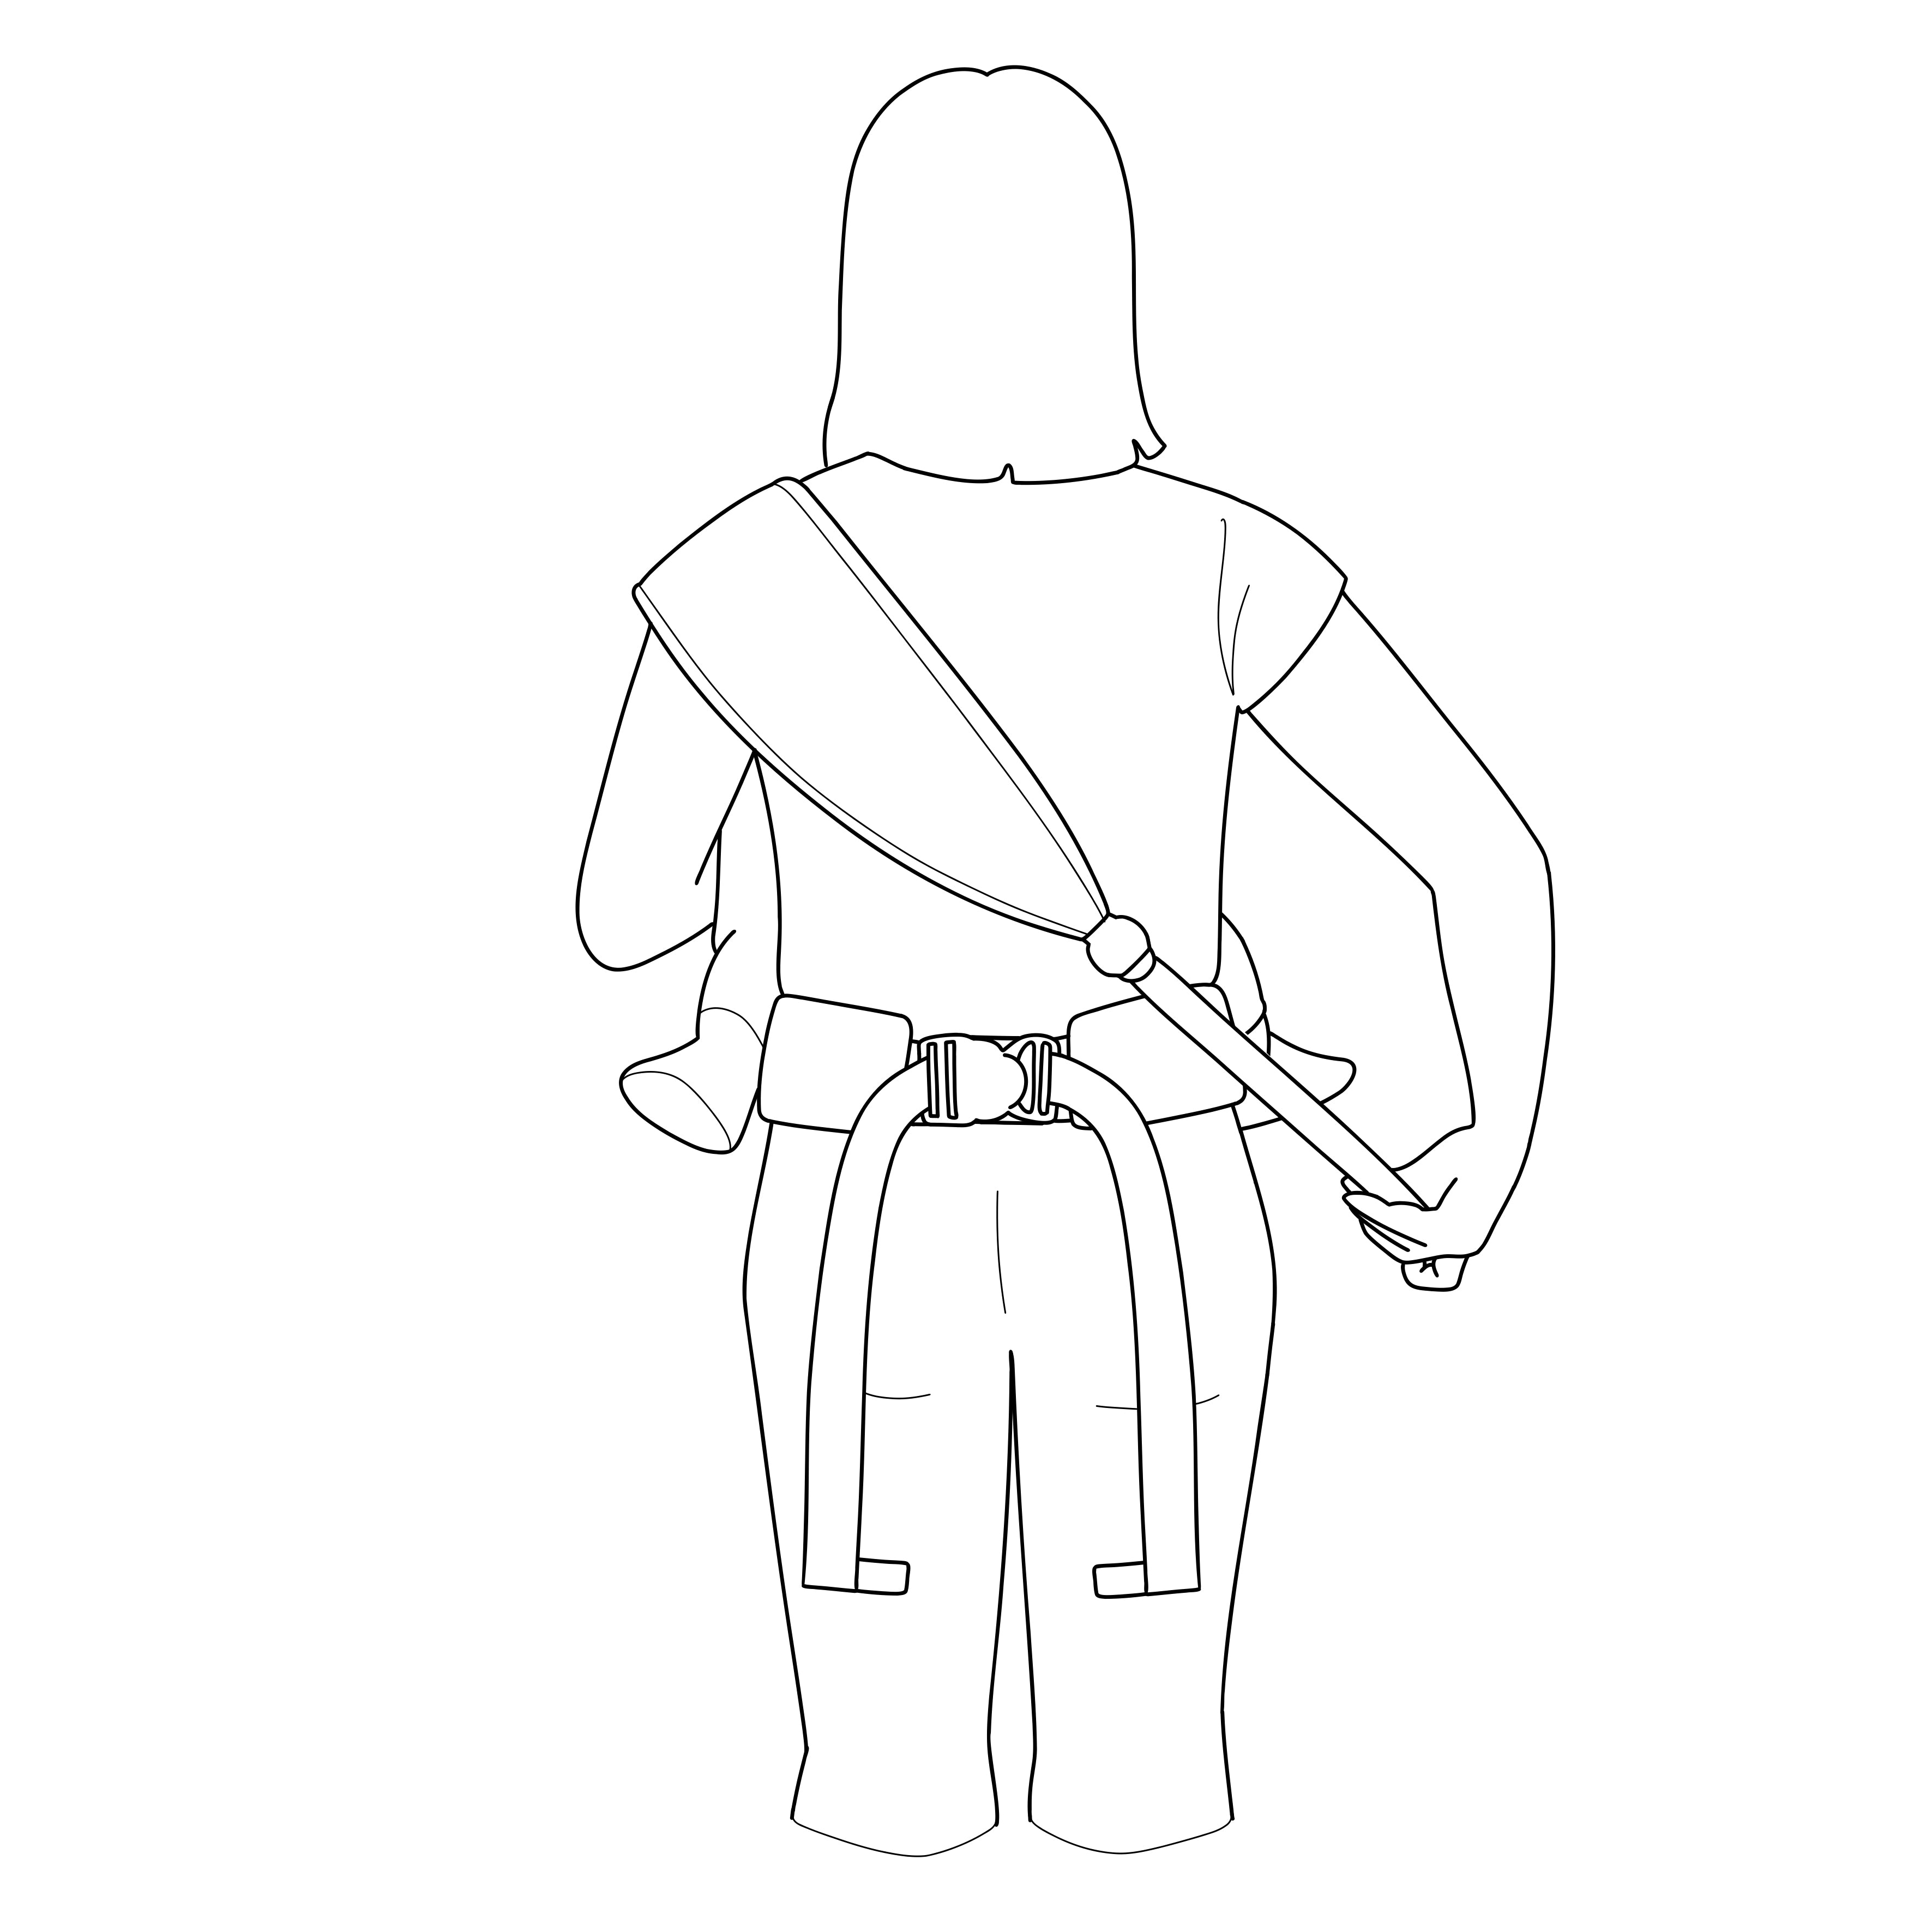
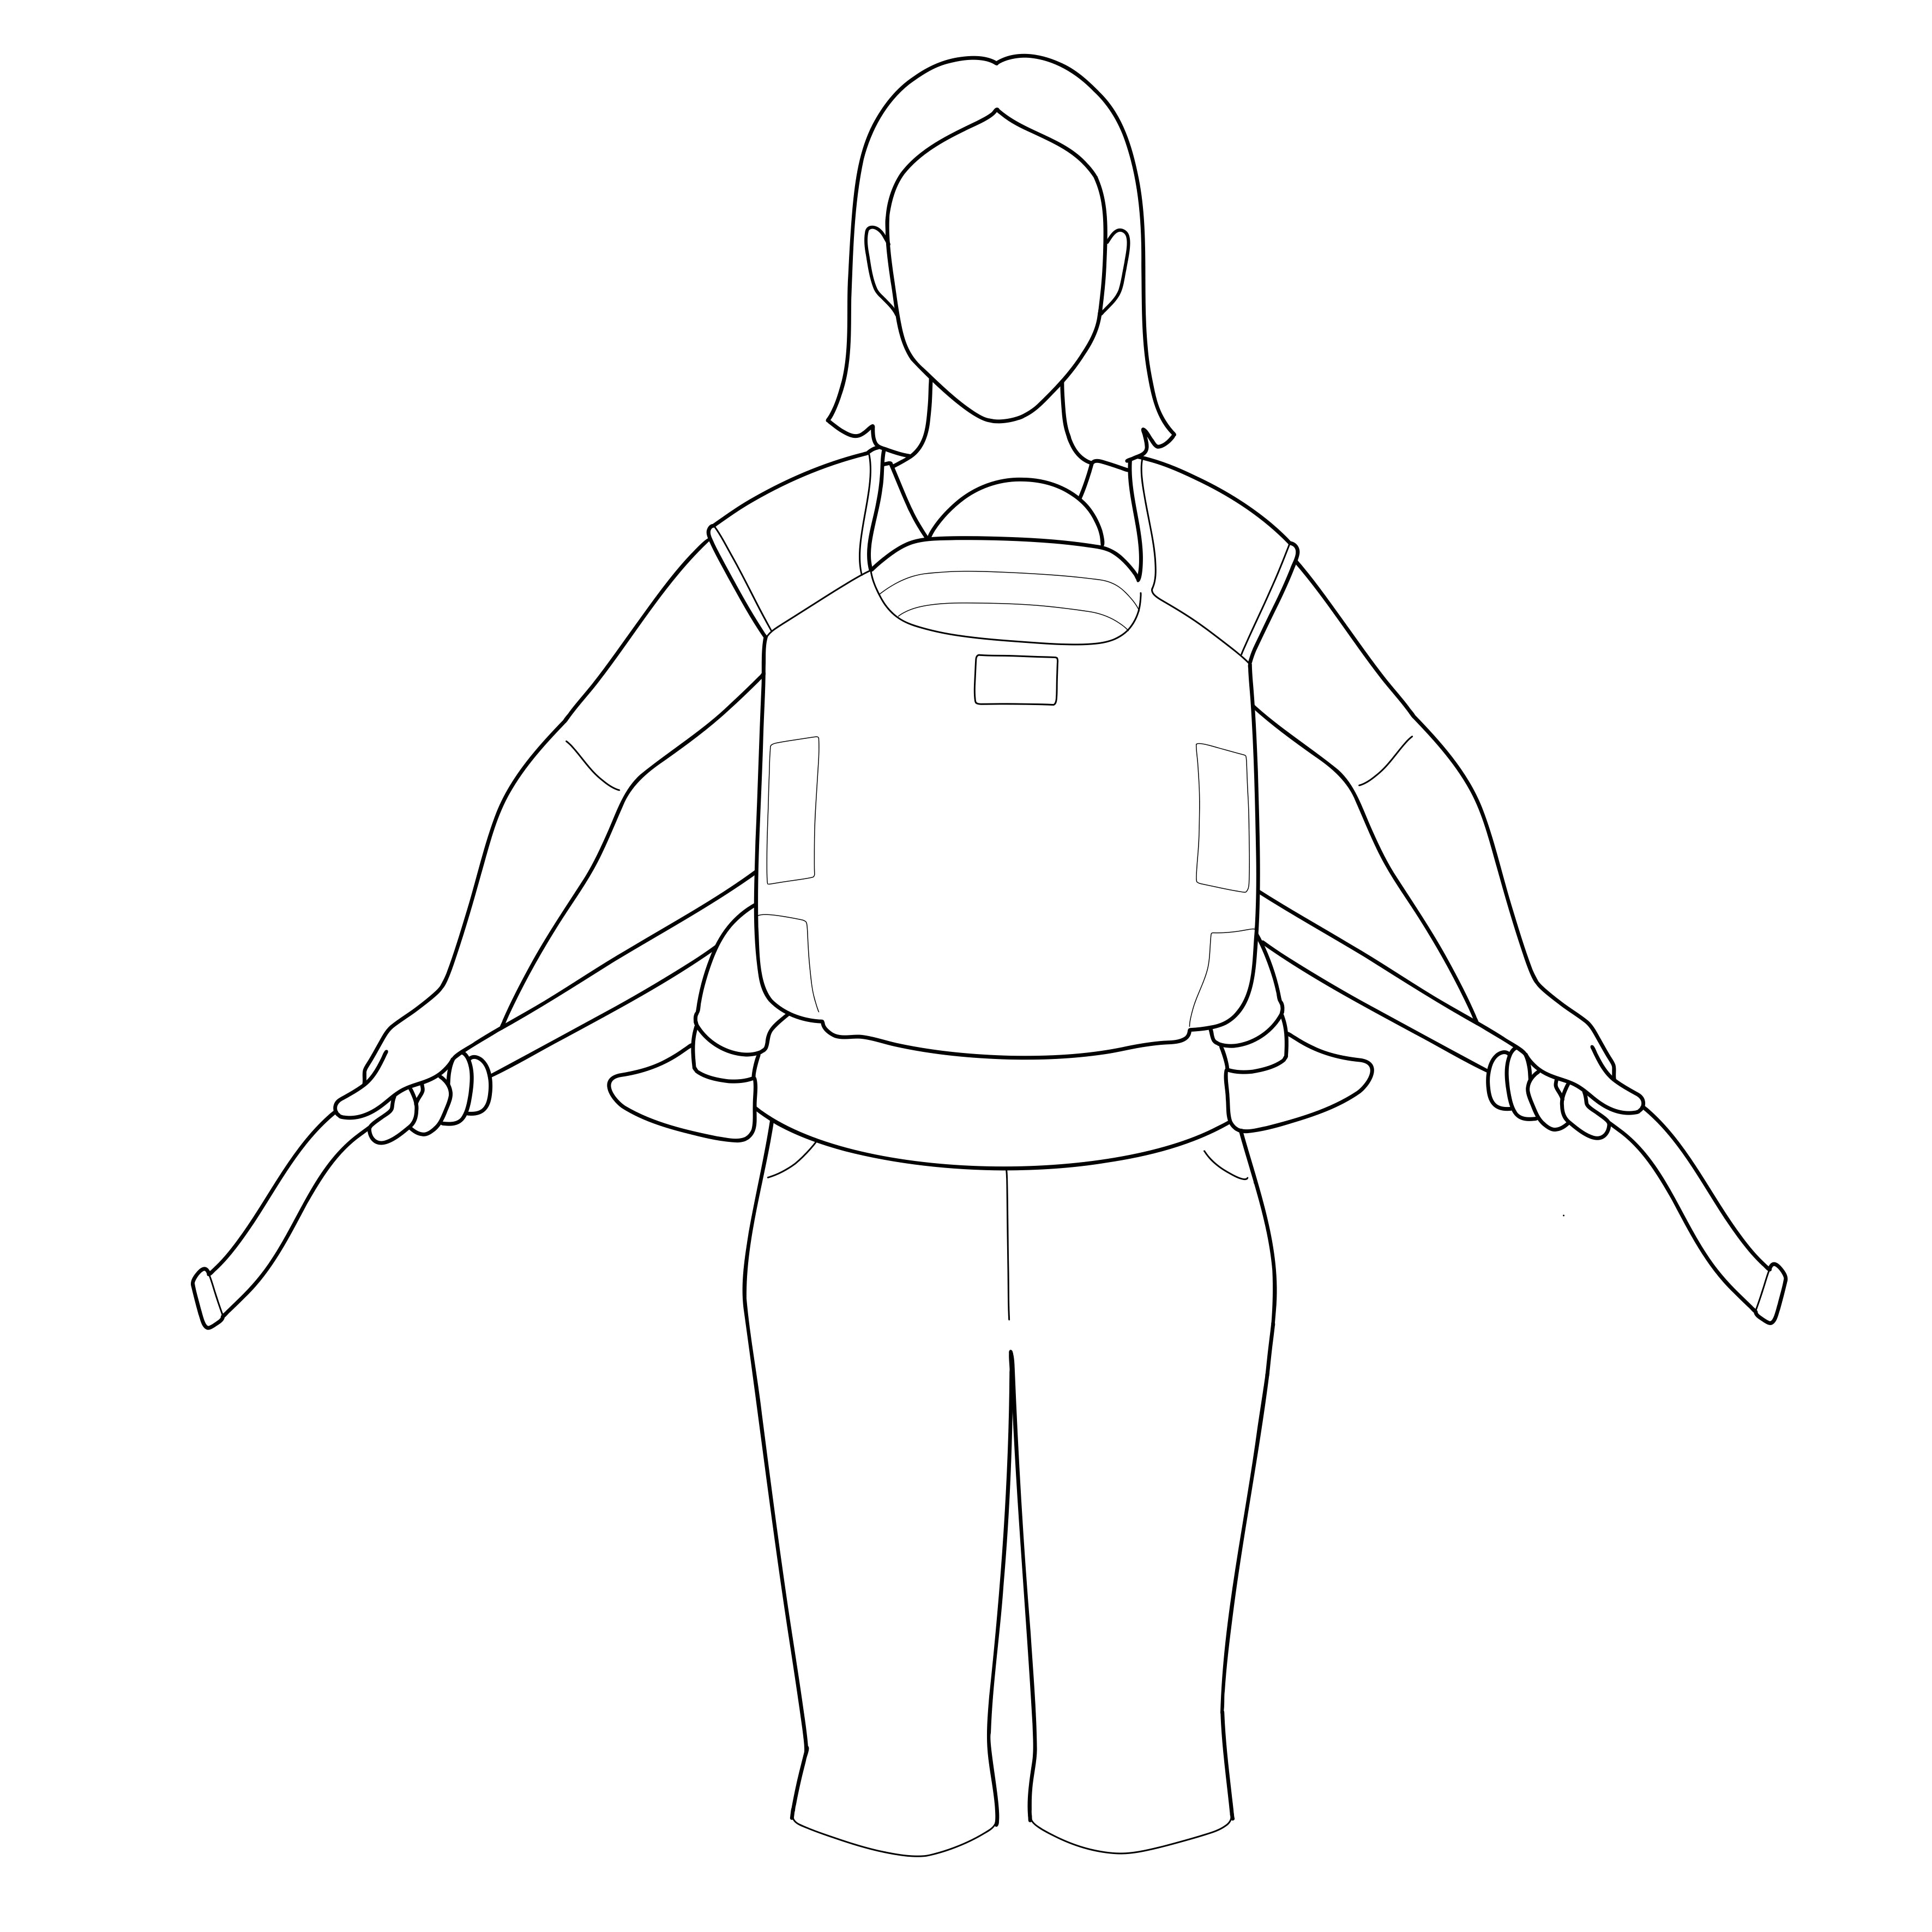
7. Grasp the strap from behind with the opposite hand and pull it diagonally downwards.
7. Grasp the strap from behind with the opposite hand and pull it diagonally downwards.
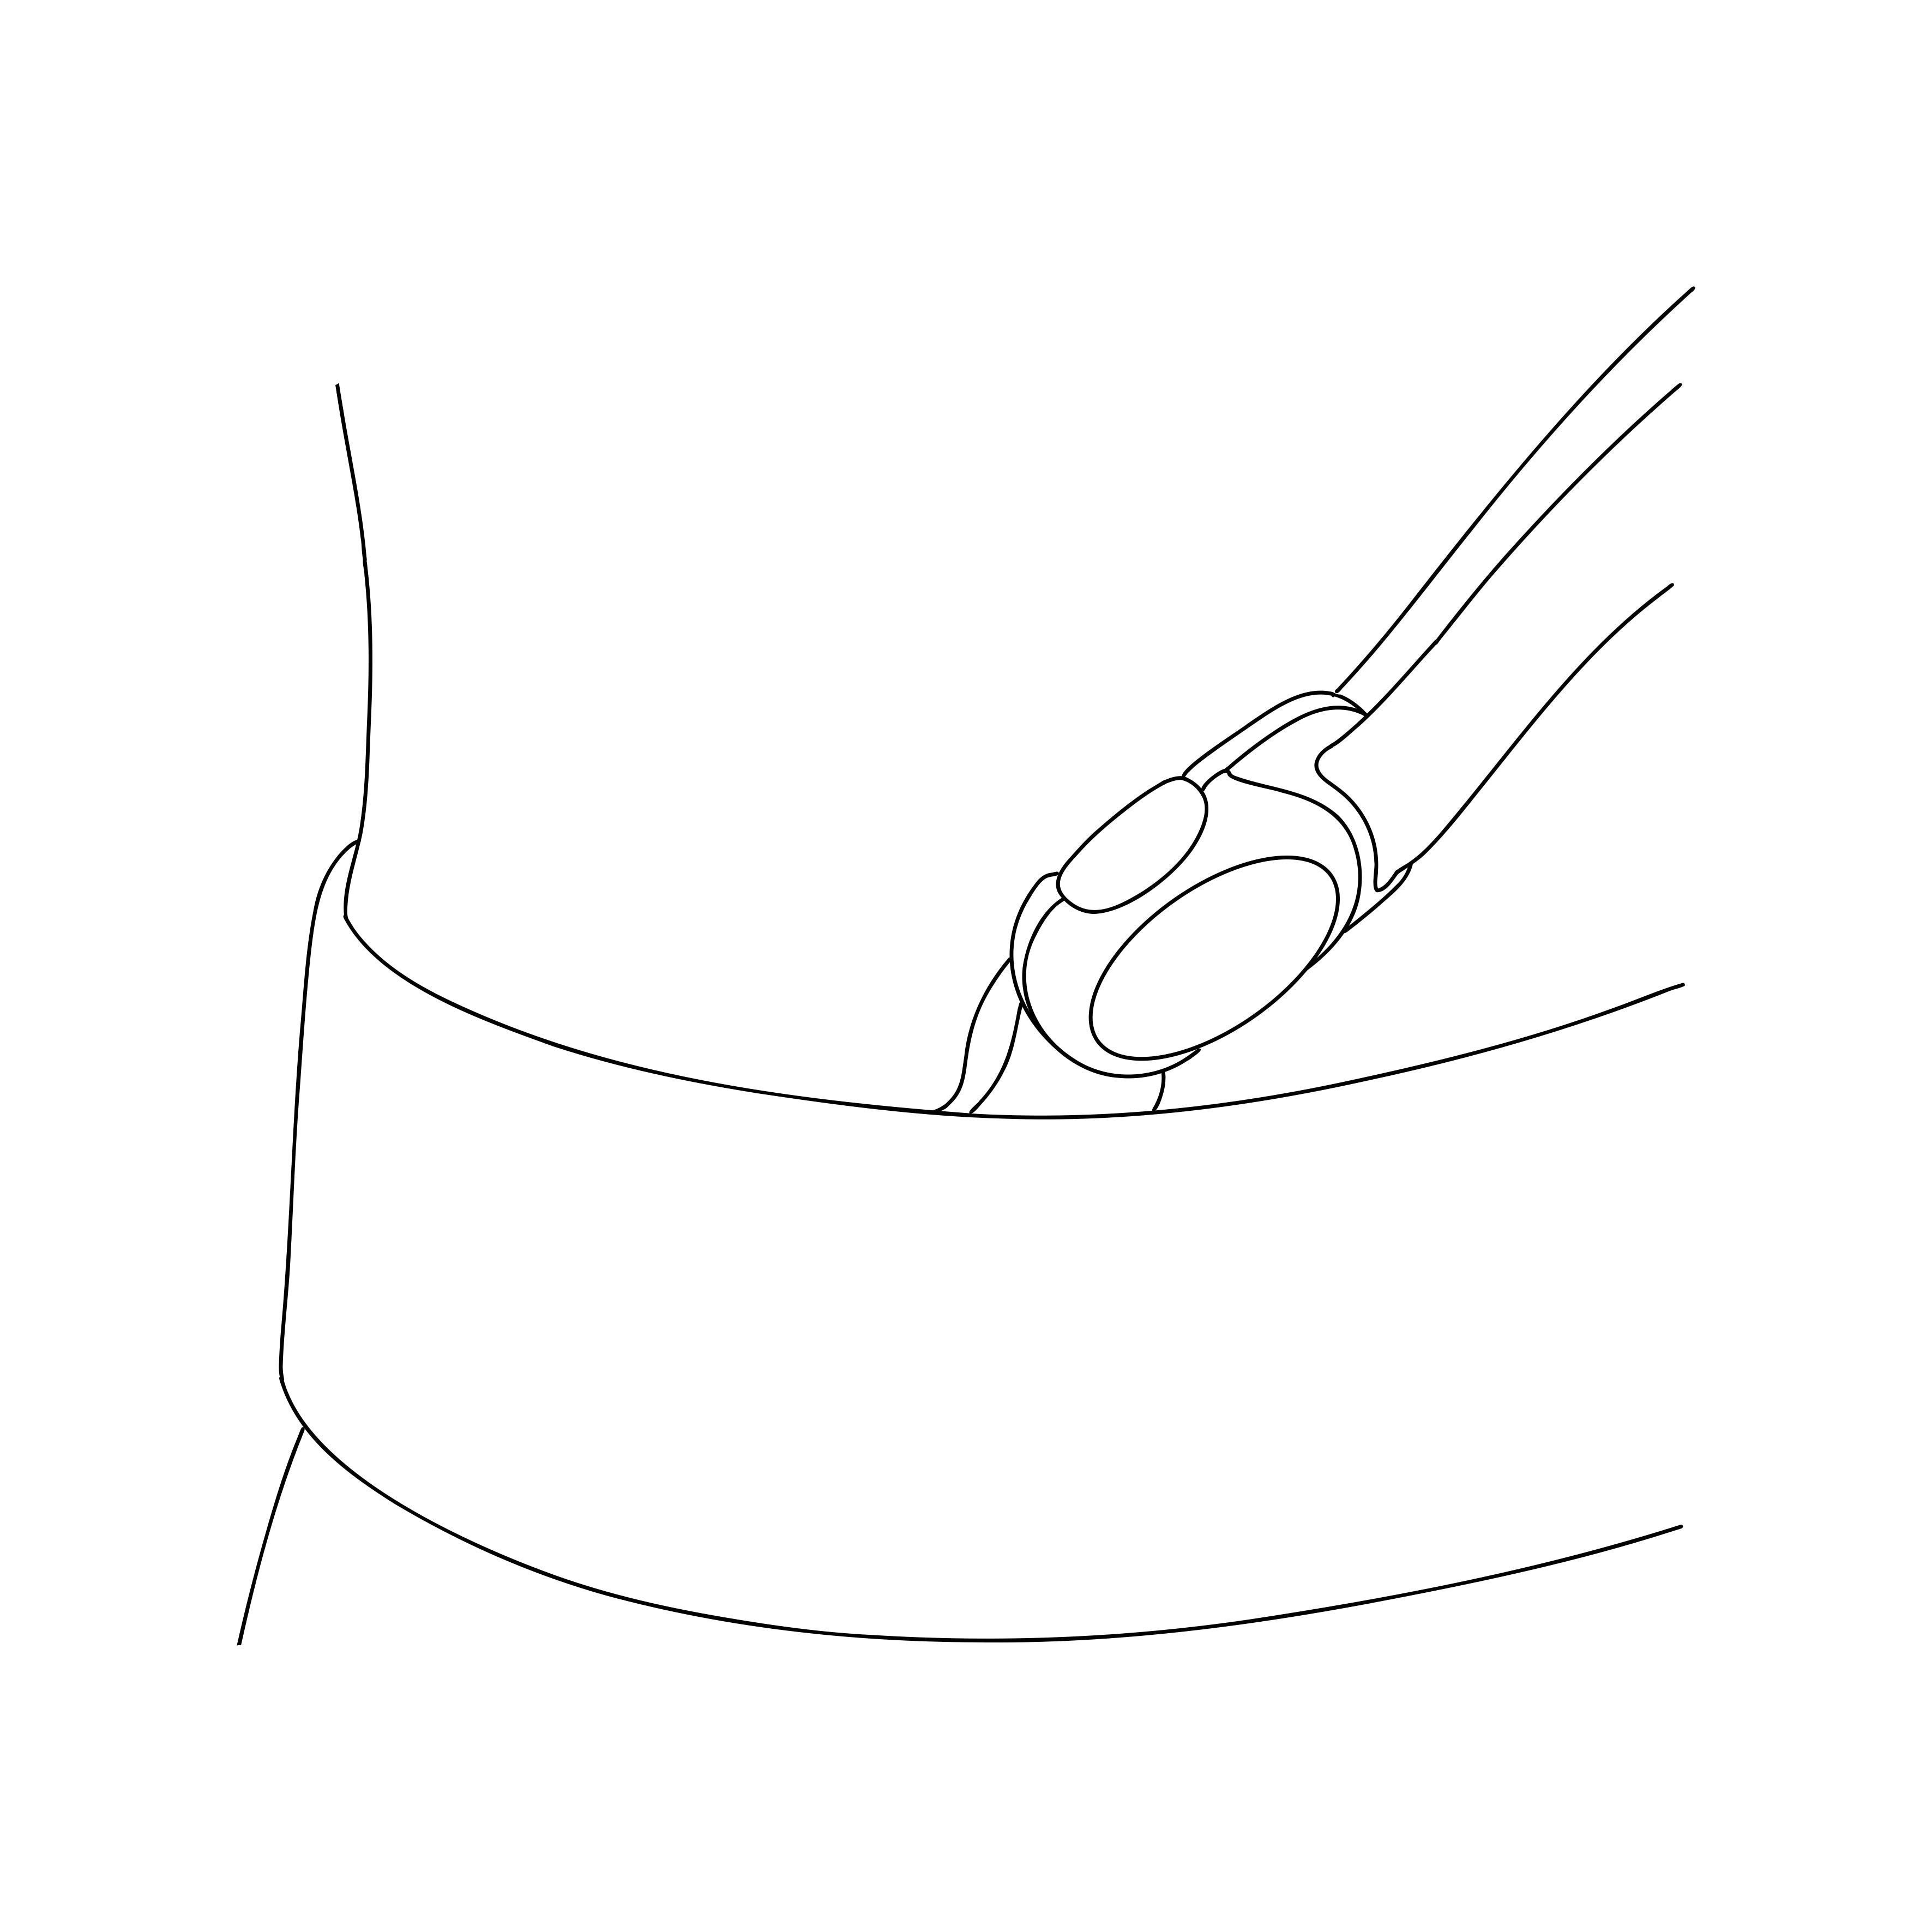
8. Guide the buckle onto the shoulder strap close to the counterpart of the buckle on the hip belt until they find each other and close.
8. Guide the buckle onto the shoulder strap close to the counterpart of the buckle on the hip belt until they find each other and close.
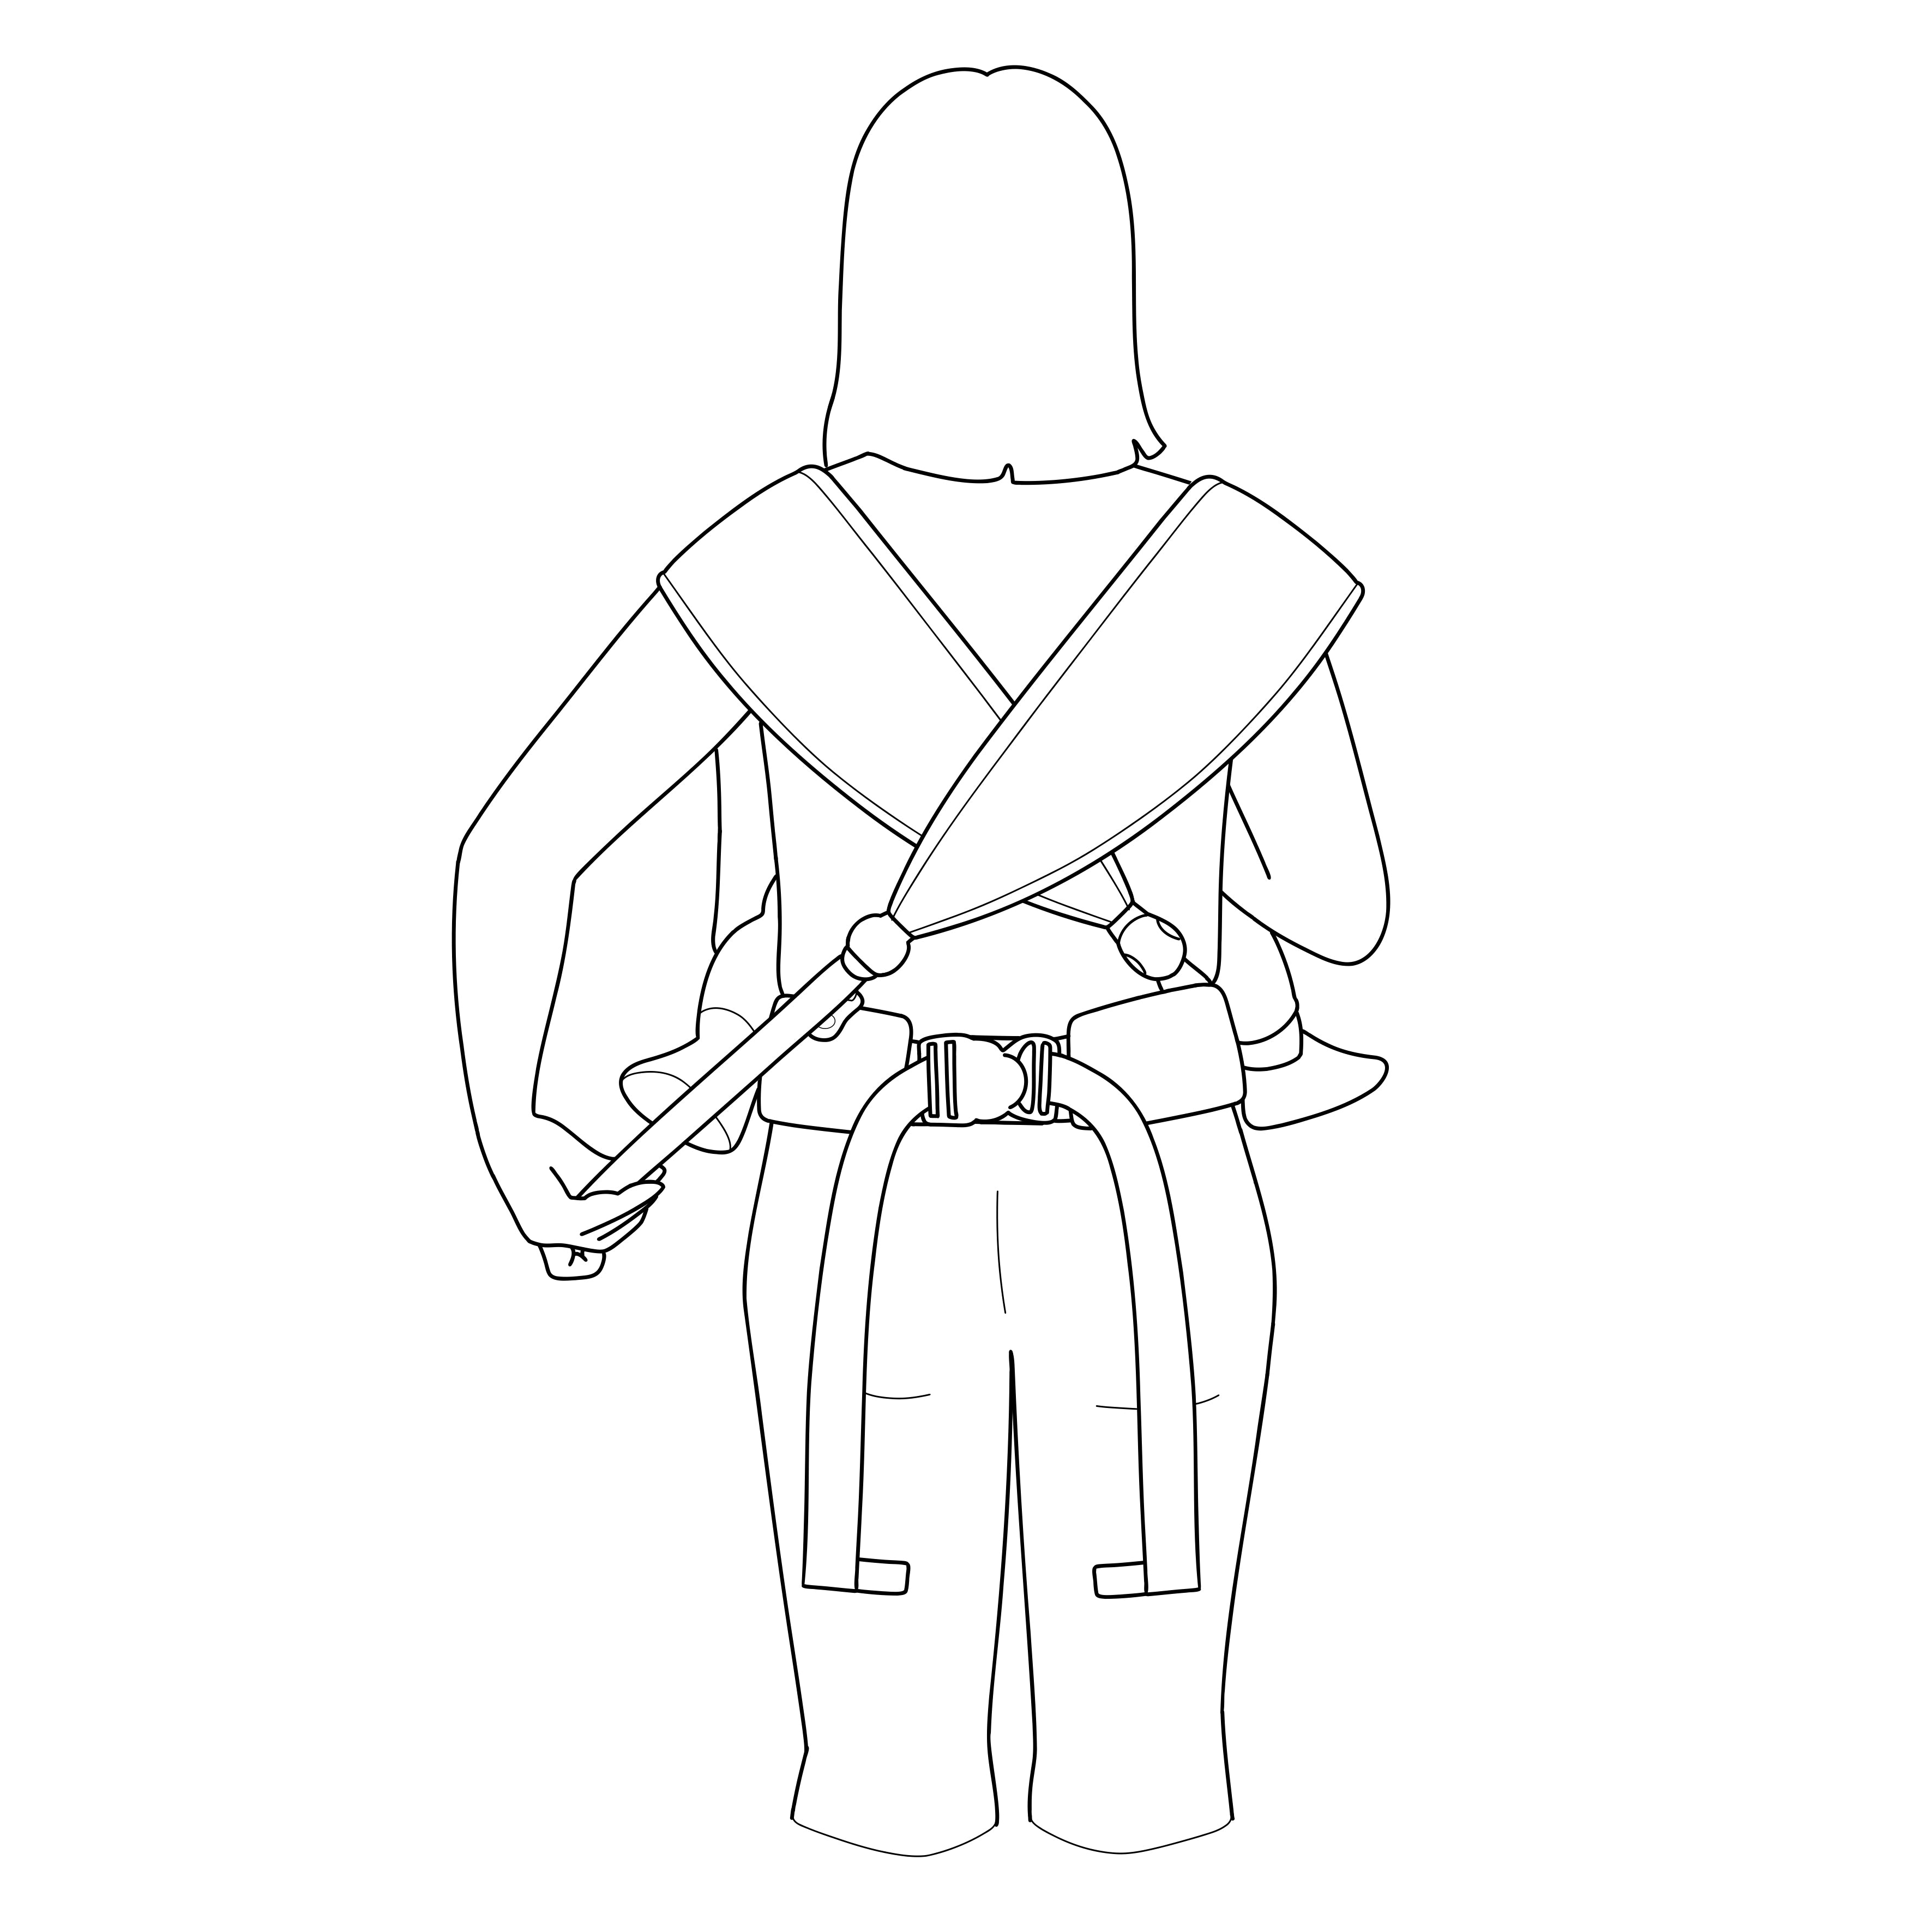
9. Repeat on the other side.
9. Repeat on the other side.
10. Tighten both straps again.
10. Tighten both straps again.
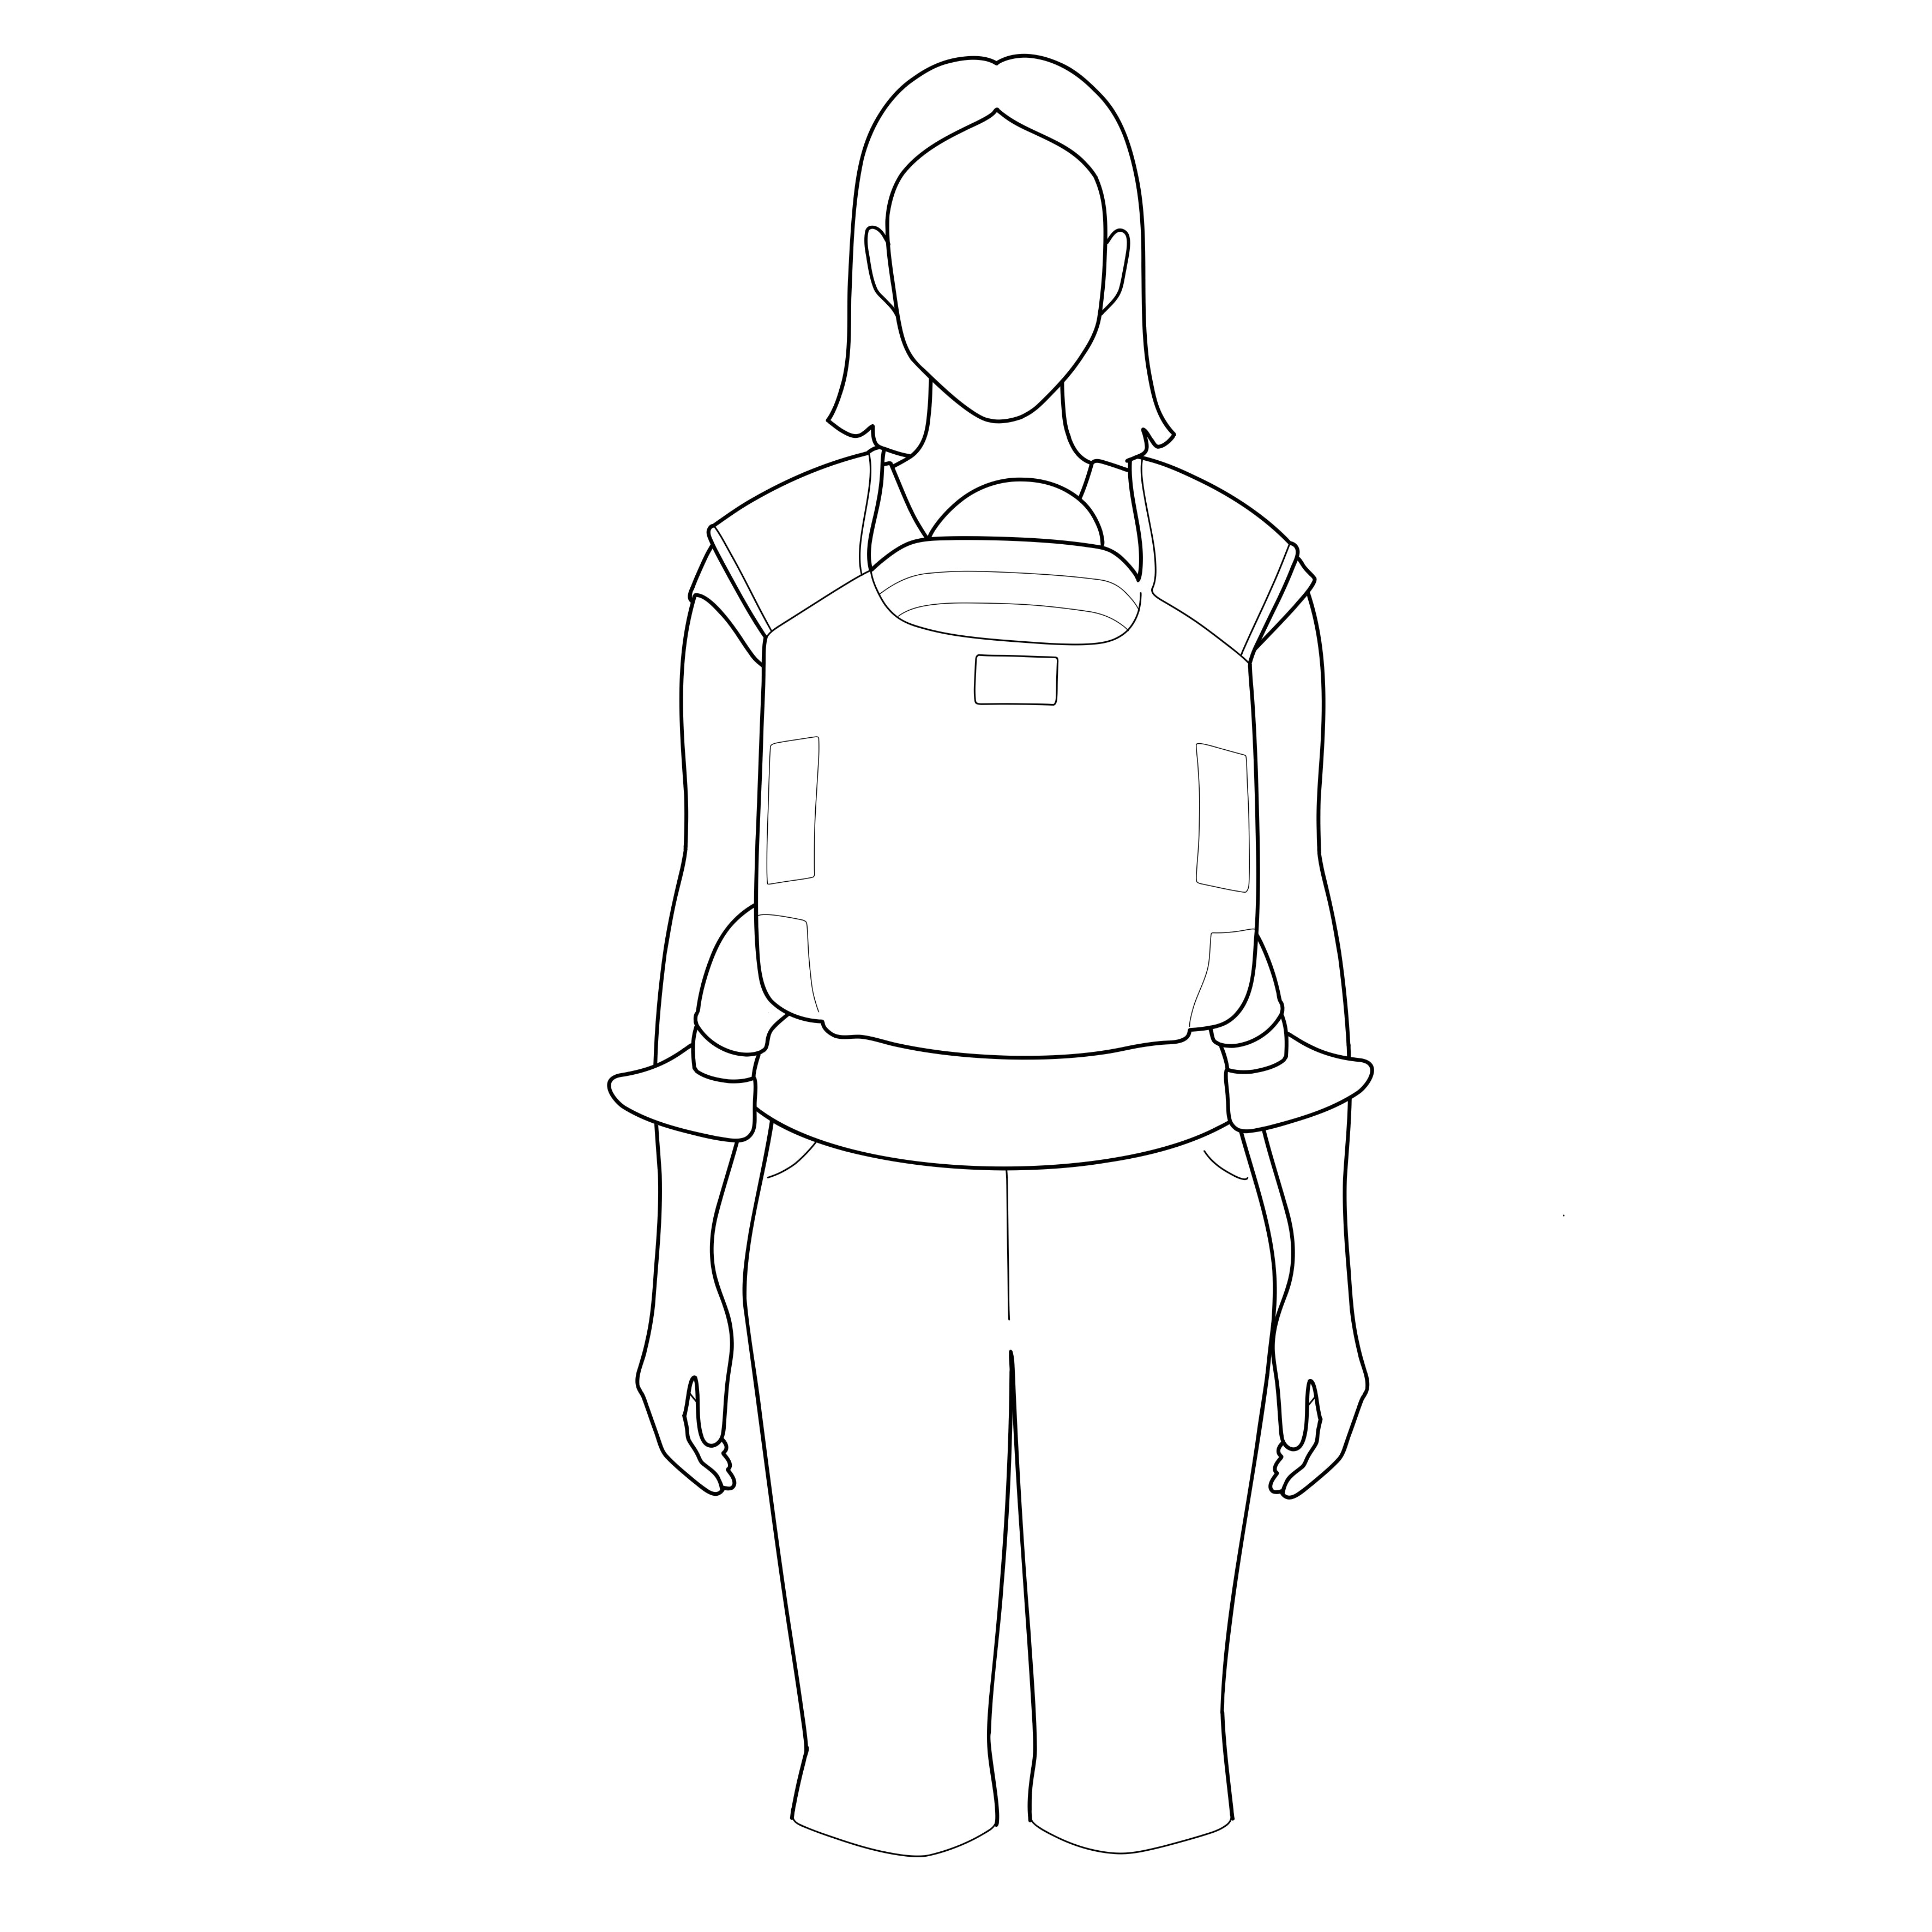
11. Check that everything is in the correct position:
- Mouth and nose clear?
- Is the carrier fastened tightly enough?
Is the back panel high enough?
- Carriers well fanned out?
- Head kiss height?
11. Check that everything is in the correct position:
- Mouth and nose clear?
- Is the carrier fastened tightly enough?
Is the back panel high enough?
- Carriers well fanned out?
- Head kiss height?

Do you have any further questions?
Feel free to contact us by email at: info@qookie-baby.com.
You can also reach us via WhatsApp at: 06192-924-9009